Audio Adapter
The Audio Adapter is a discrete PCB that connects to the main board by a flex PCB cable. It includes the ability to take analog audio in and out of the board.
Overview
Historically, we originally had the Audio Headphone connector on the board itself. But one of the main challenges of manufacturing has been that the module on the bottom of the board doesn't really allow for any through-hole components to be used. Having evaluated lots of options and board space area, we determined that we really couldn't find a good quality connector that we could fit on the top board that we're proud of. So given that this was a Kickstarter, we decided to just swallow our pride and built a small Audio Adapter.
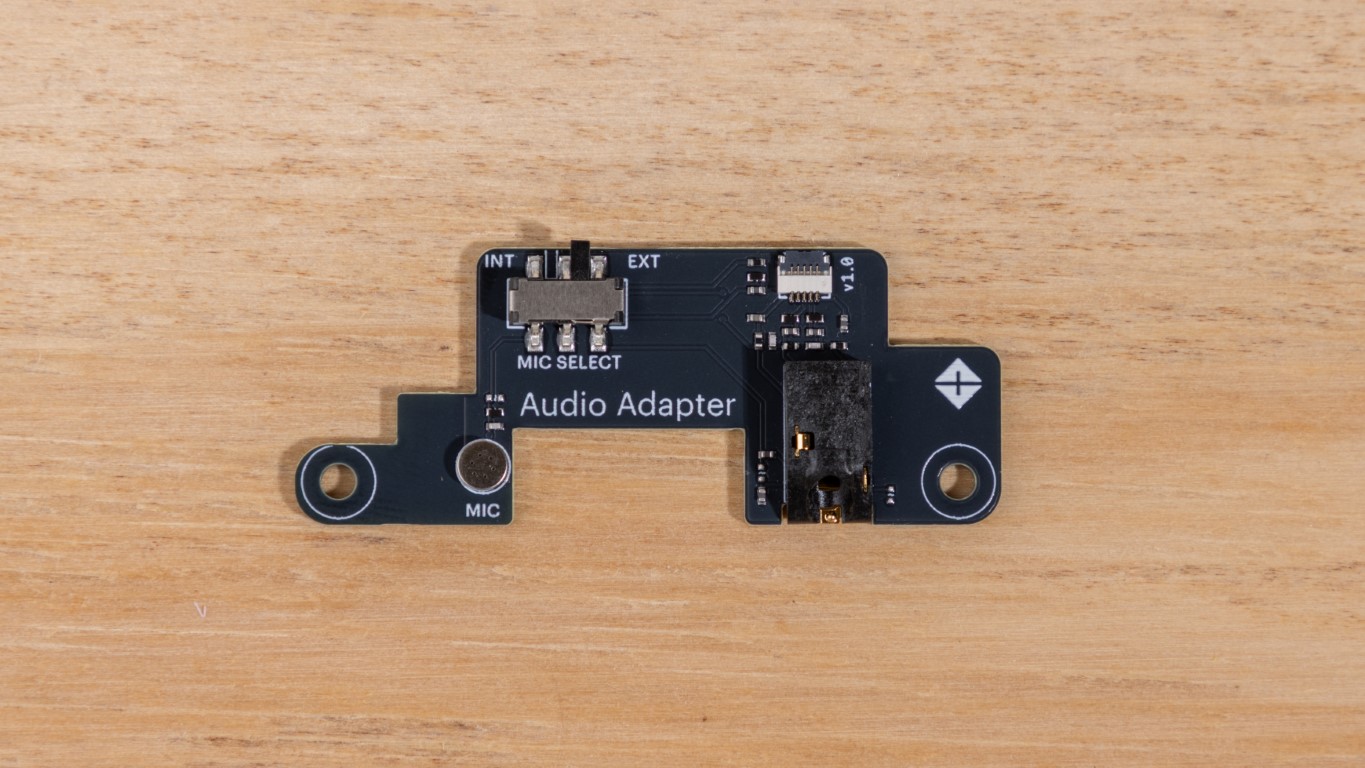
That Audio Adapter can go either at the front or at the back of the board. It is highly configurable. It can even go outside of the box if you so want it. It supports a built-in microphone with a switch. The alternative is a headphone port which supports a three-pin headphone adapter with either a microphone and a headphone active, or if the switch is set, a built-in microphone and then external headphones.
The audio board uses ALSA under the hood. It can be configured to record and play audio in the usual ways inside the device. Note that if the audio board isn't connected, the main system won't determine that headphones are plugged in and probably won't switch the routing. But if you force the audio out of it, nothing bad will happen—you'll just not get any egressed audio.
| Label | Description |
|---|---|
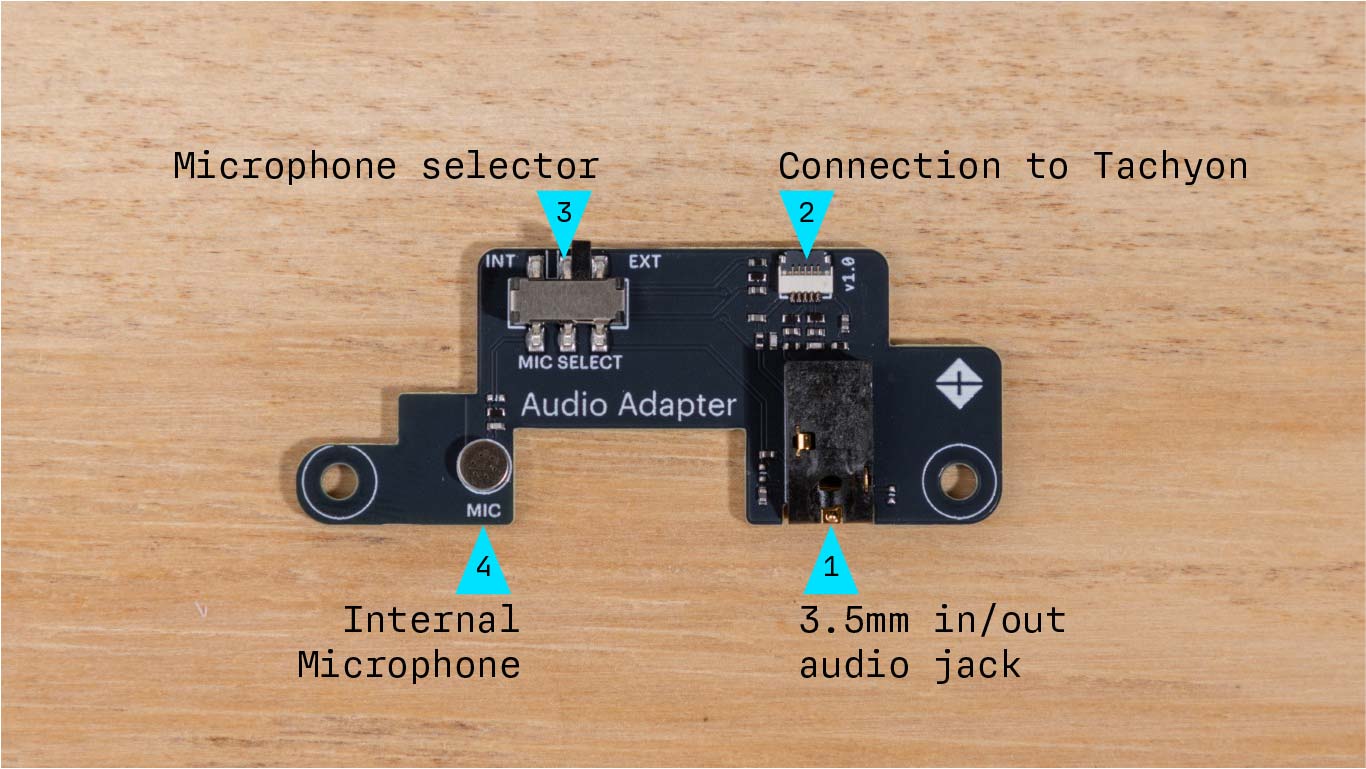
| 1 | Headphone/microphone connector (3.5mm) |
| 2 | Connection to Tachyon |
| 3 | Microphone selector |
| 4 | Internal microphone |
The headphone connector can also be used with amplified speakers.
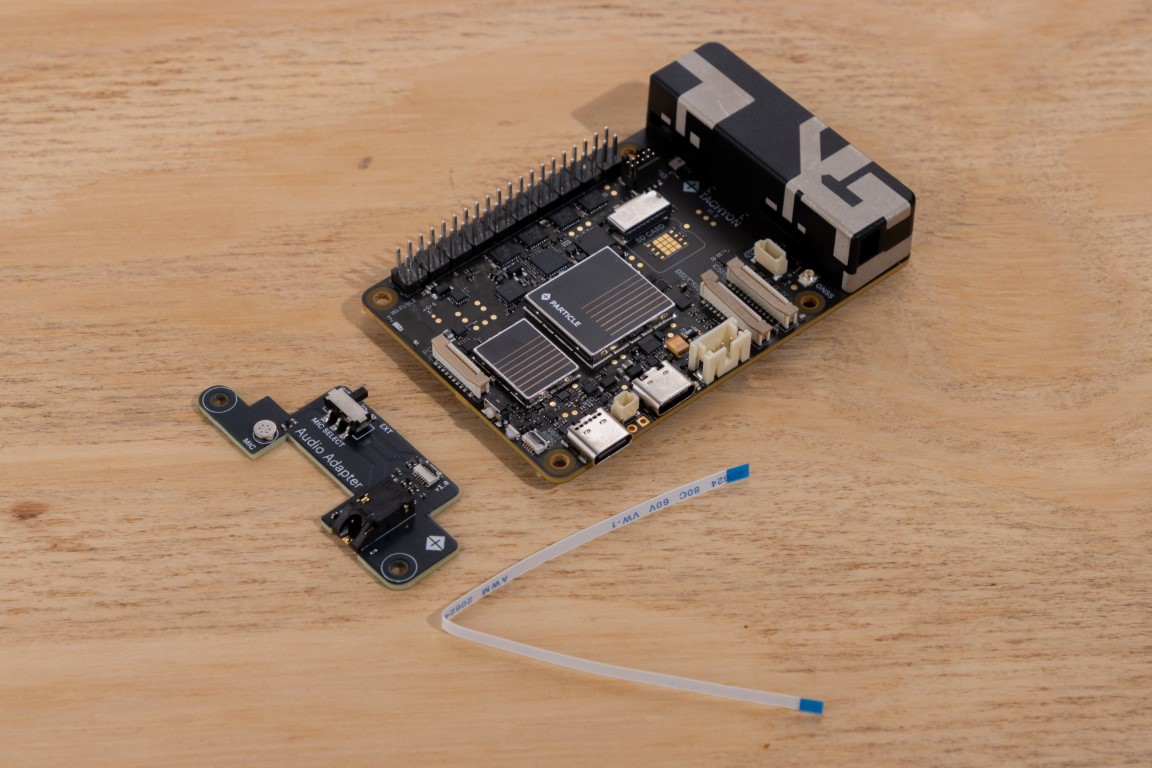
🎧 Audio Adapter Assembly
The audio adapter connects to your Tachyon using a 5-pin Flexible Flat Cable (FFC).
For this step, you’ll need:
- The audio adapter board
- The FFC cable
Both are included in your Tachyon kit.
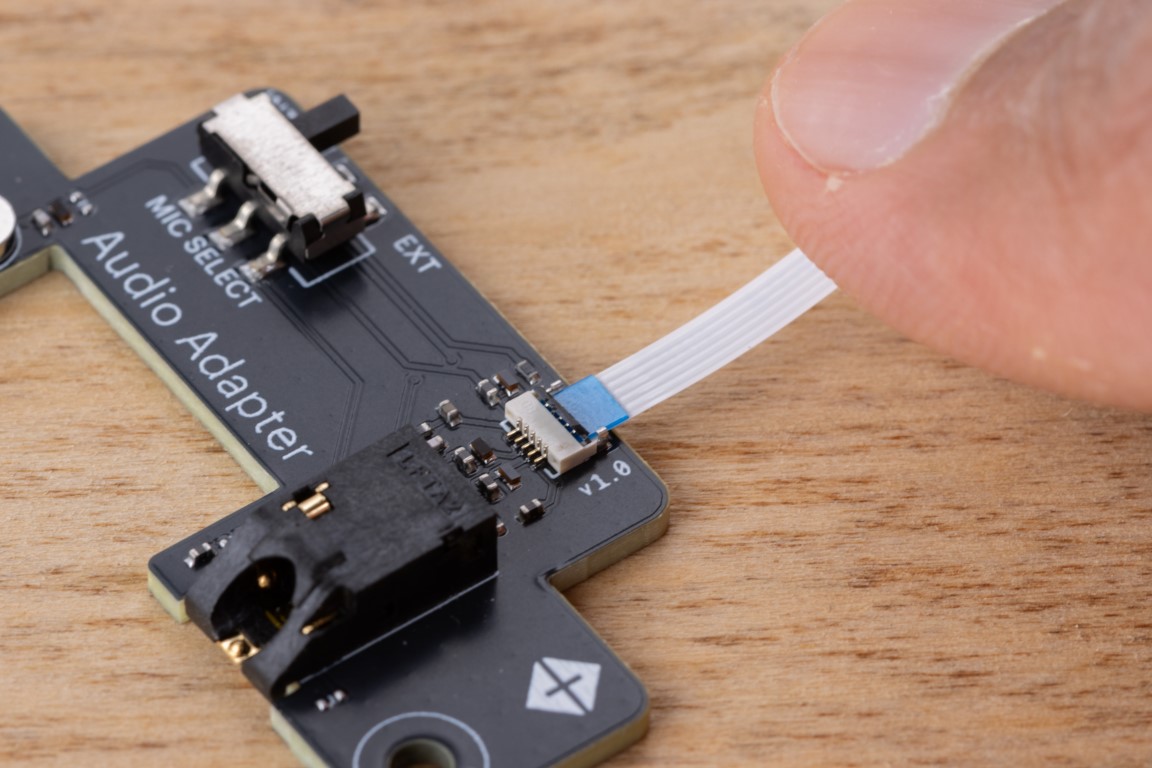
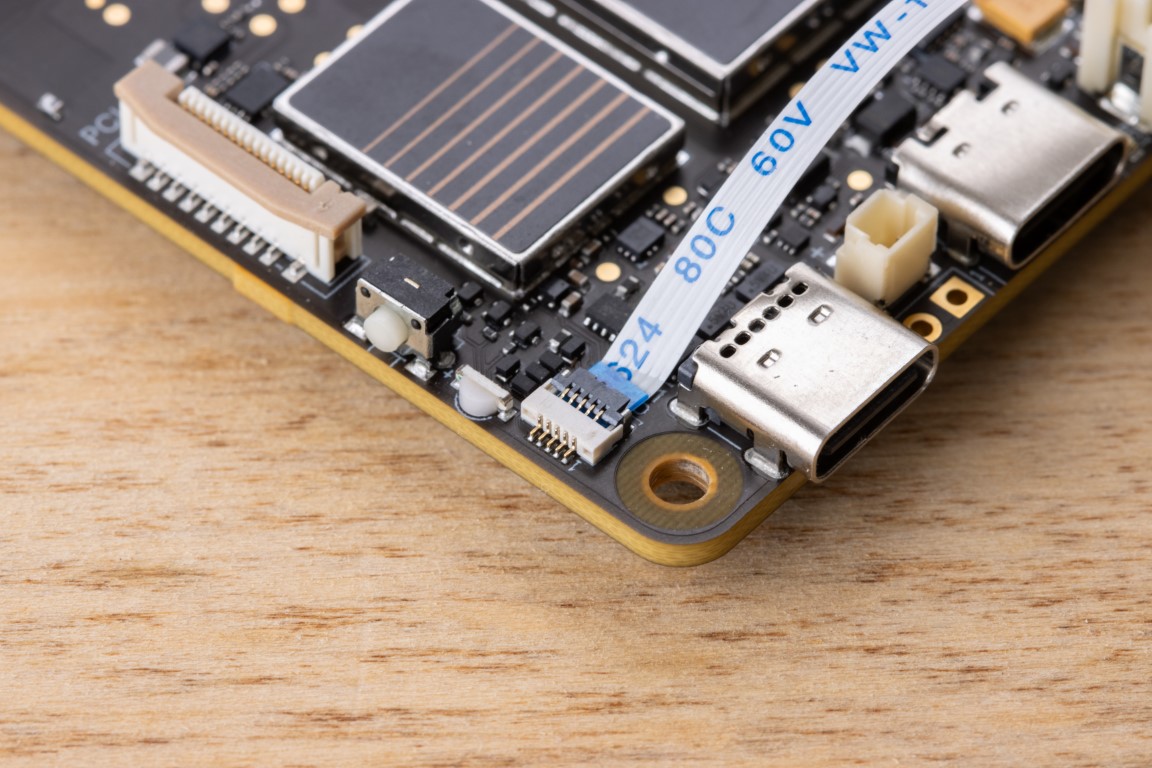
Start by opening the latch on the FFC connector of the audio adapter board.
You can use your fingertips or a small flat-head screwdriver to gently lift the latch.
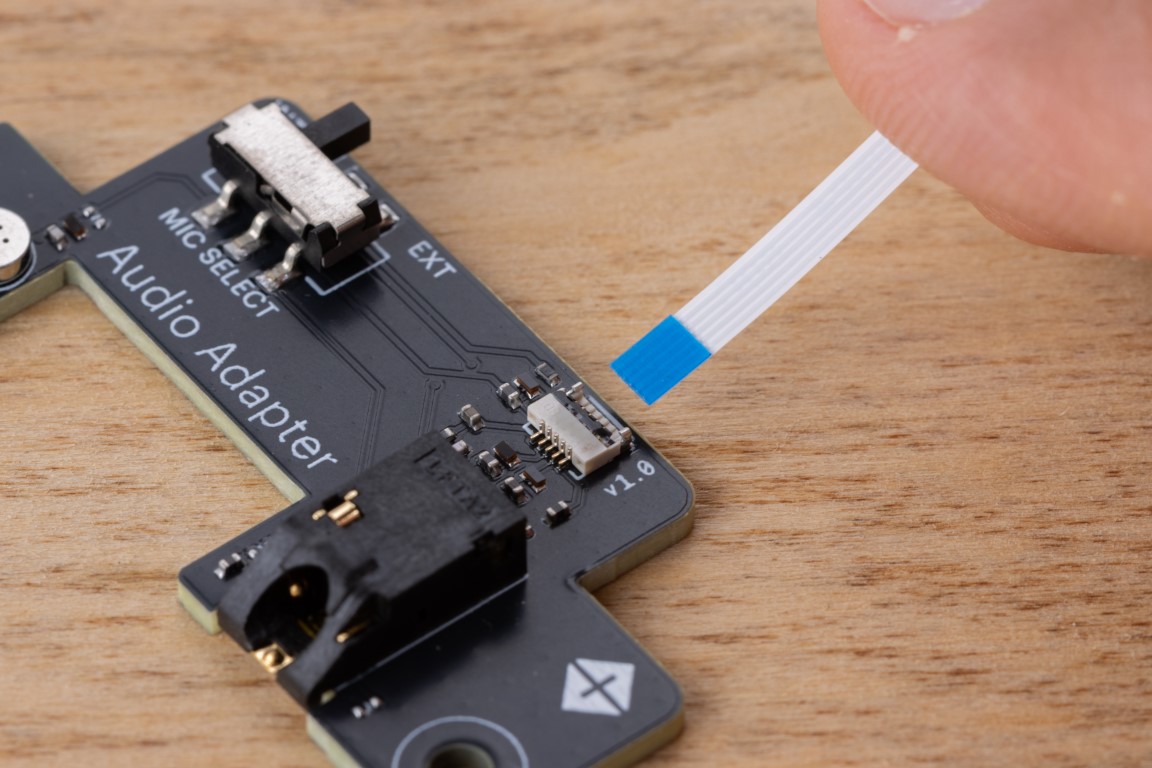
Insert the FFC with the blue tab facing up. Gently slide the cable into the connector until fully seated.
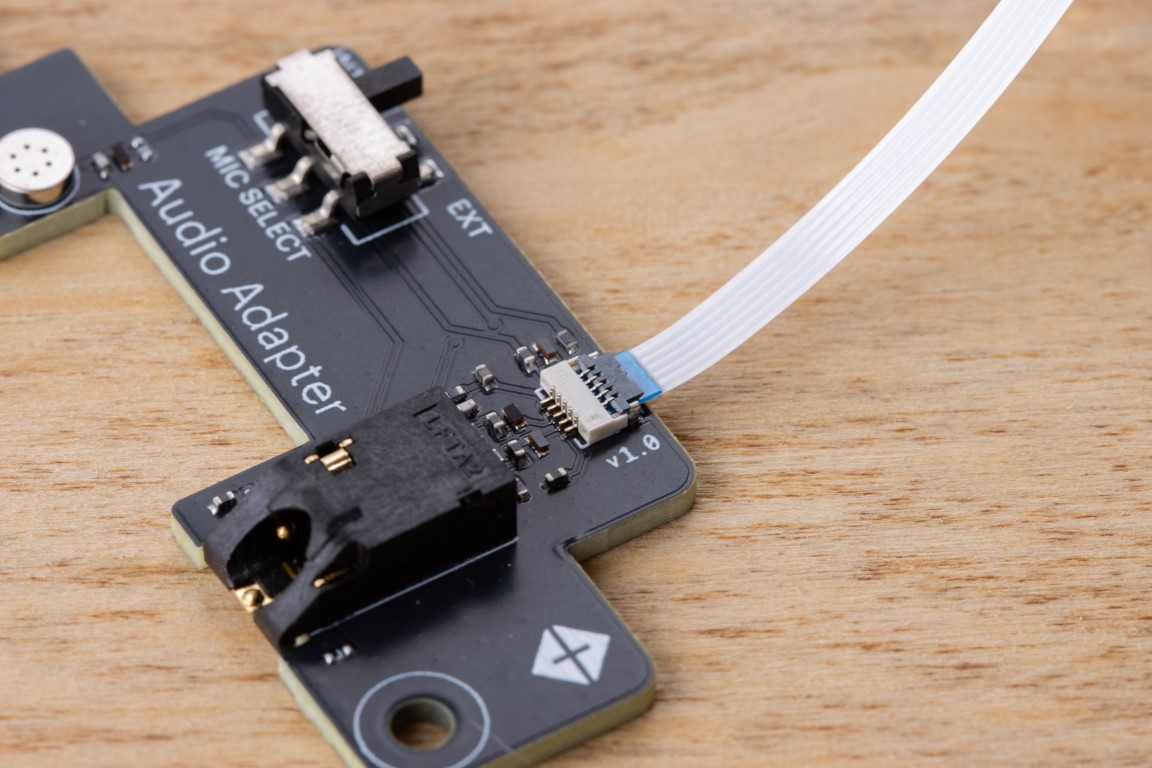
Once the cable is inserted, close the latch on the connector. The cable should lie flat and snug in the housing.
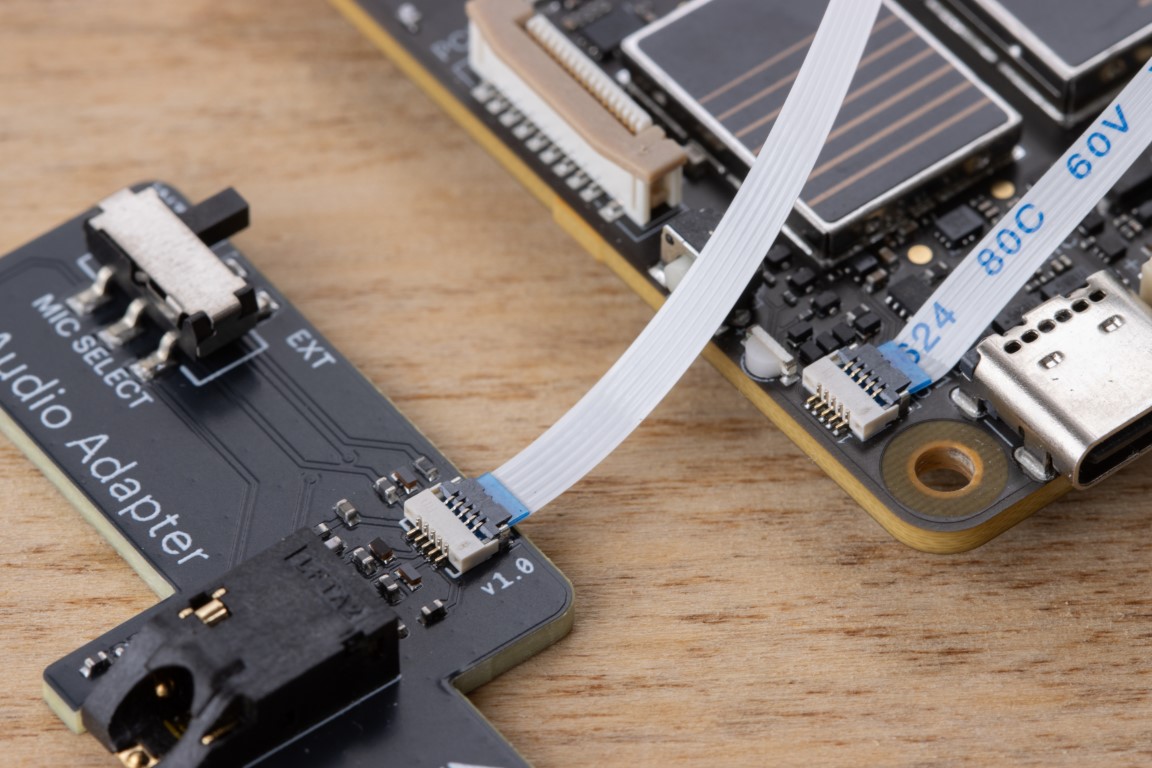
Now repeat the process on the Tachyon board—open the latch on its FFC connector.
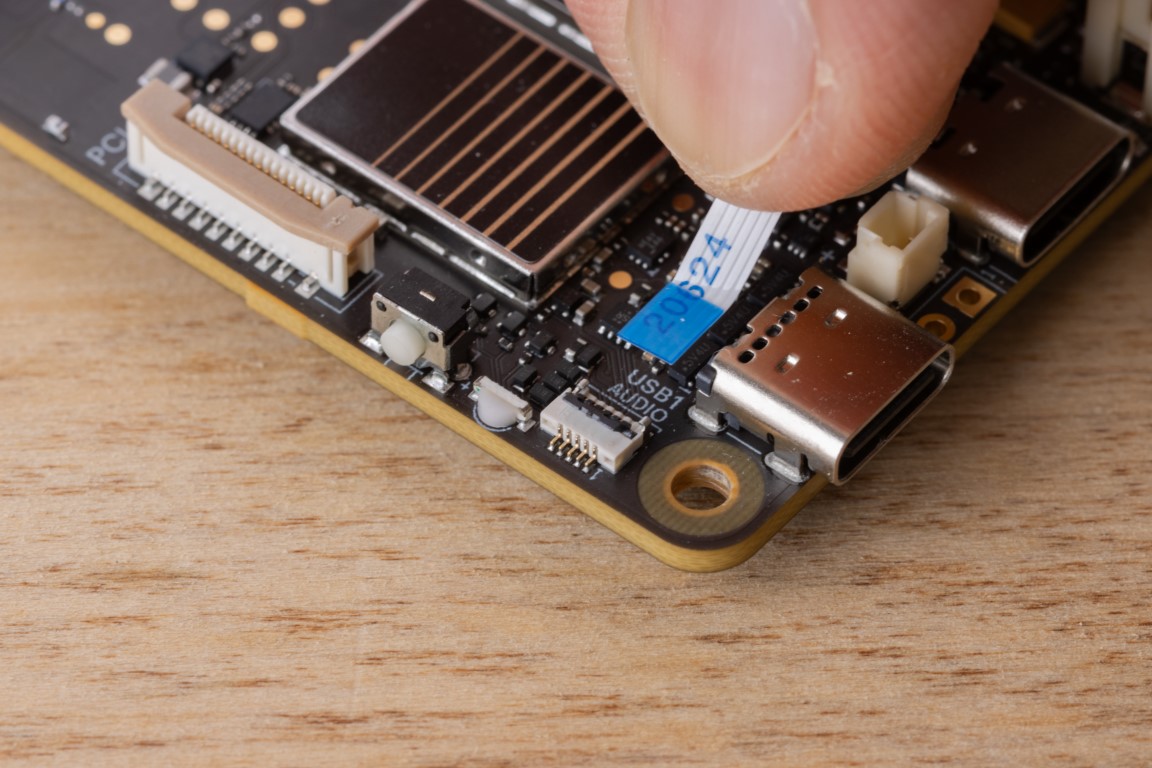
Insert the other end of the cable, again with the blue side facing up.
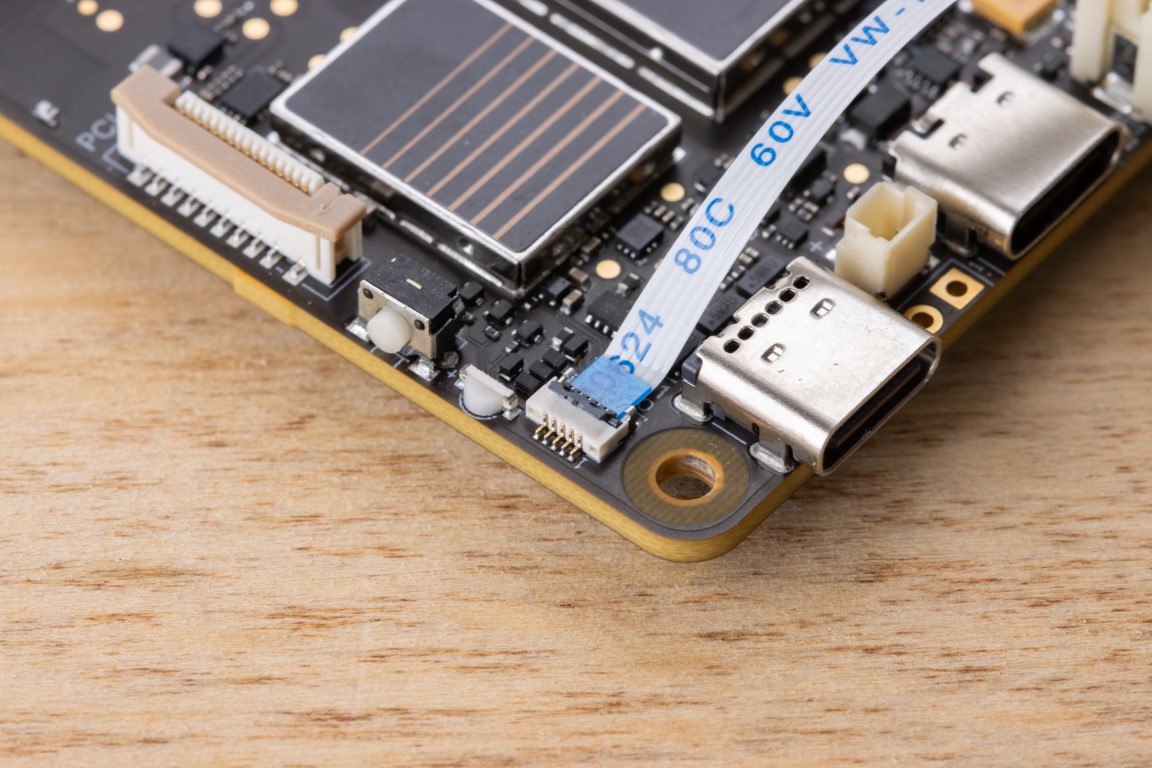
Close the latch to lock the cable in place.
Check both ends and make sure the cable is firmly connected on both the Tachyon and the adapter side.
Once everything is in place, your connection should look like this 👇
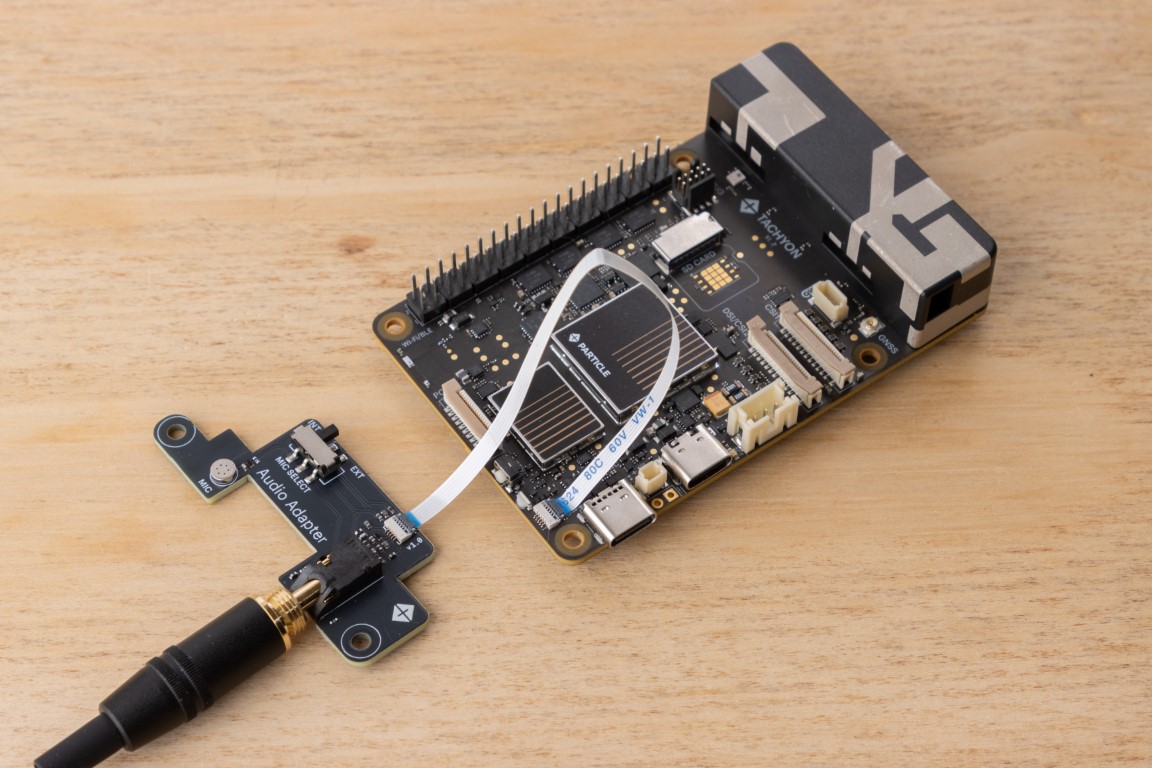
You can now plug in a 3.5mm headphone jack and enjoy audio output!
🎤 Microphone switch tip:
- Set the switch to
EXTif you’re using an external mic, like those on earphones. - Set it to
INTto use the onboard mic on the adapter board.
🔩 Optional Mounting
You can optionally mount the audio adapter board on top or underneath the Tachyon using nylon spacers and screws.
Note: These are not included in the kit.
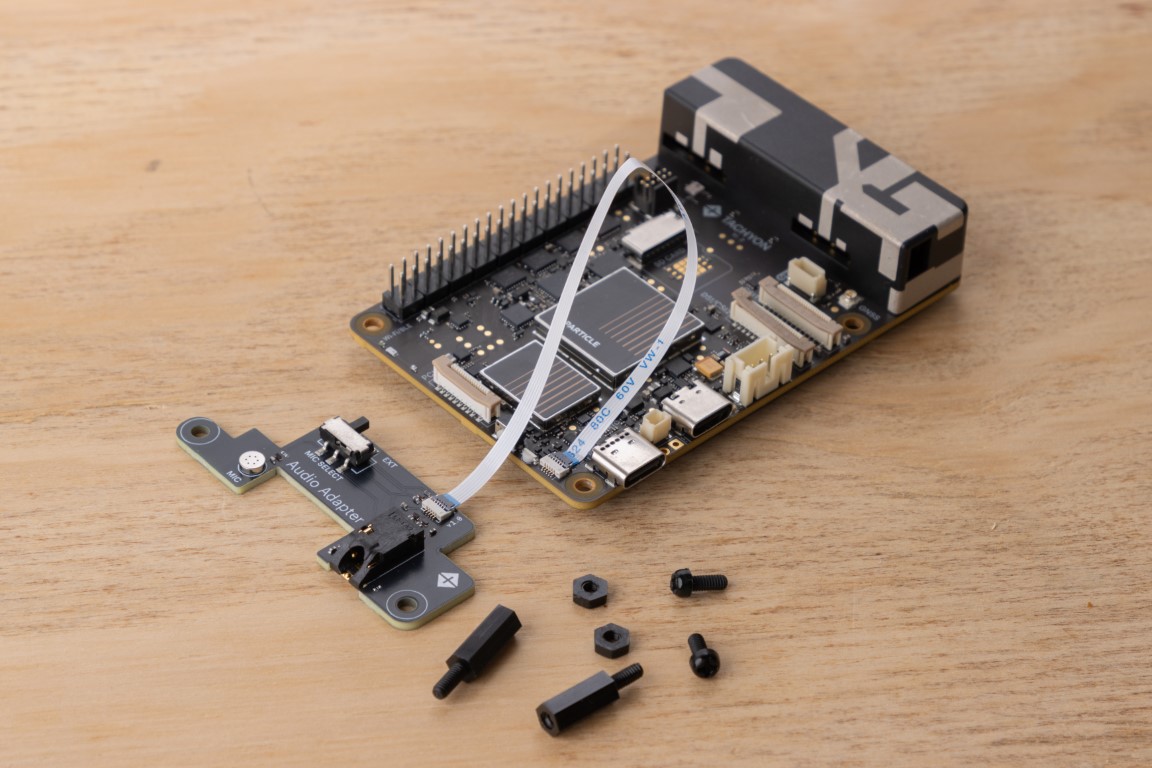
In this example, we’re using M2.5 x 11mm nylon spacers to mount the board on top.

Mounting the board helps keep the setup tidy and reduces stress on the FFC.
🔊 Audio Usage (Requires sudo Access)
Some audio routing and device configuration commands require root privileges.
Below are minimal working scripts for playback and recording when running as root or with sudo.
▶️ Play an Audio File (as root)
This script sets up audio output routing and plays a WAV file.
Save it as play.sh:
#!/bin/bash
# Run this script as root or with sudo privileges

# Configure output routing
tinymix set 'ADC Source Mux' 'left data = left ADC, right data = left ADC'
tinymix set 'Output 1 Playback Volume' '20'
tinymix set 'PCM Volume' '192'
tinymix set 'Left Mixer Left Playback Switch' '1'
tinymix set 'Right Mixer Right Playback Switch' '1'
tinymix set 'OUT1_L Switch' '1'
tinymix set 'OUT1_R Switch' '1'
tinymix set 'PRI_MI2S_RX Audio Mixer MultiMedia1' '1'

# Play the provided audio file
tinyplay "$1"
Run it like this:
sudo bash play.sh /etc/misc/soundlib/telephone_ring.wav
🔉 You should hear the audio through the connected output (headphones, line-out, or speaker).
If not, check your mixer routing withtinymixor verify the audio device node (e.g./dev/snd/pcmC0D0p).
tinyplay is a test utility. The audio mix and routing settings applied before playback are typically reverted once tinyplay finishes, due to the behavior of this test command. For persistent audio routing, use ALSA configuration files or a custom playback service instead.
🎙️ Record an Audio File (5 seconds, as root)
This example shows the minimal path setup for capture, and records 5 seconds of audio.
Save as record_root.sh:
#!/bin/bash
# Run this script as root or with sudo privileges

# Configure input routing
tinymix set 'MultiMedia1 Mixer PRI_MI2S_TX' '1'
tinymix set 'Capture Digital Volume' '192'
tinymix set 'Left Channel Capture Volume' '8'
tinymix set 'Right Channel Capture Volume' '8'
tinymix set 'Capture Mute' '0'
tinymix set 'Left PGA Mux' 'Line 1L'
tinymix set 'ADC Source Mux' 'left data = left ADC, right data = left ADC'

# Capture to the specified file (5-second limit)
tinycap "$1" -t 5
Run it like this:
sudo bash record_root.sh audiocapture.wav
🎧 Once recorded, play back your file using the earlier
play.shscript:
sudo bash play.sh audiocapture.wav
tinymix,tinyplay, andtinycapall access ALSA mixer and PCM devices directly — root privileges are often required on systems where/dev/snd/*is not world-writable.- You can add your user to the
audiogroup to avoid usingsudoevery time:sudo usermod -aG audio $USER
newgrp audio - Verify correct routing if you get silence or “device busy” errors.
On the current OS build (Ubuntu 20.04.6 LTS), audio is only supported in headless mode.
Audio output does not work in the desktop environment at this time.
Support for desktop audio is planned in a future release—stay tuned!