Assembling Tachyon
Let’s get your Tachyon up and running! 🚀
In this section, we'll walk you through a couple of different ways to assemble and power up your device — starting with the easiest and fastest: headless mode.
But first, make sure you’ve got everything you need!
What You’ll Need
- Tachyon device
- 3-pin Li-Ion battery (included in your kit)
- USB-C cable — We recommend a USB 3.1 Gen 1 or higher.
You can use USB 3.0 for initial setup, but if you’re planning to stream video or transfer large files, go with a higher-spec cable.⚠️ Make sure it’s not just a charging-only cable!
- 💻 A computer (Windows, macOS, or Linux) to update the OS and configure the device
Headless Setup (Quick & Easy)
For first-time setup, we highly recommend the headless method. It’s fast, reliable, and gets your Tachyon ready to roll without needing any accessories or screens.
Steps
-
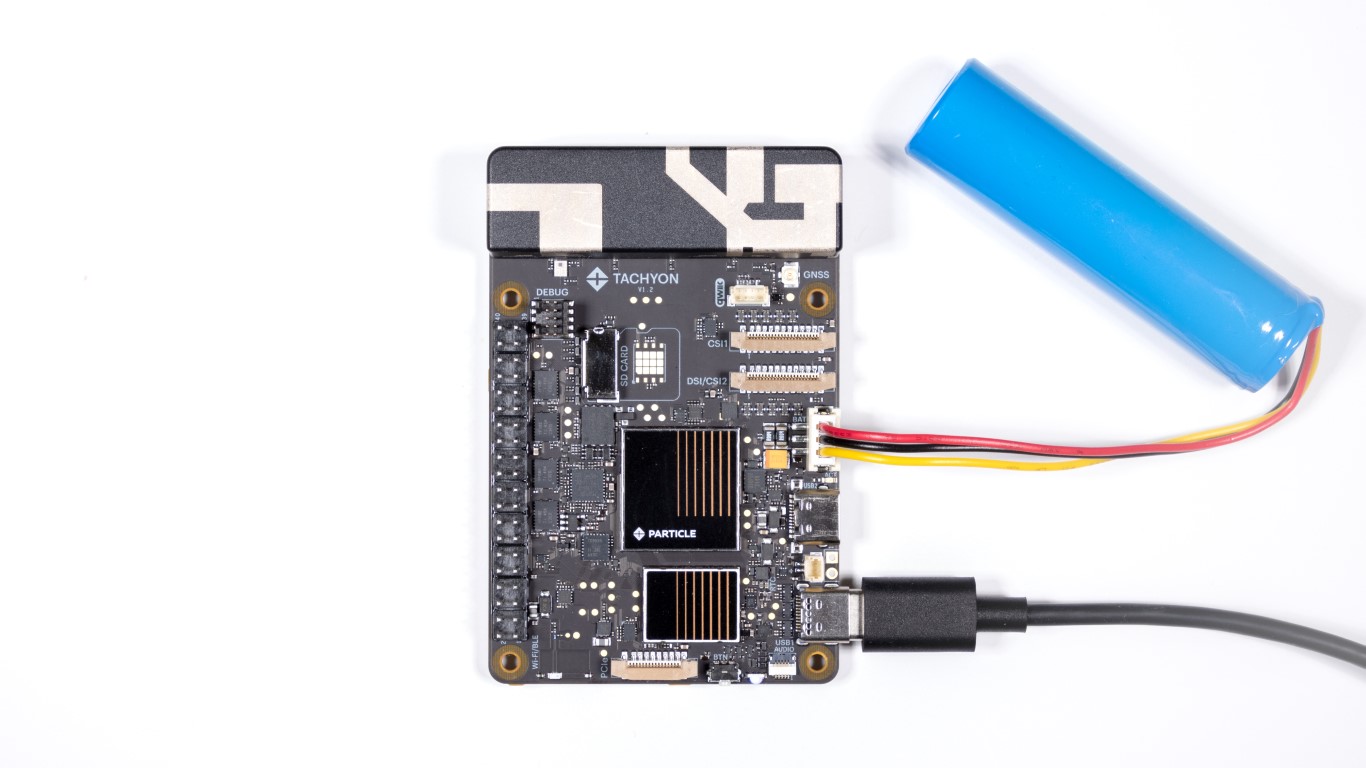
Plug in the battery
Connect the 3-pin Li-Ion battery into the matching 3-pin battery connector on the board.It only fits one way! There’s a small guide tab to make sure you can’t insert it backwards. To unplug, gently pull — no tools needed.
-
Connect USB-C
Plug one end of your USB-C cable into the primary USB port (USB1) on Tachyon, and the other end into your computer.The USB-C connector is reversible — plug it in either way.
-
Power check
The primary LED on the board should light up red — that means Tachyon is powered on and ready!
🎉 That’s it! You’re ready to move on to the next step: updating the OS and configuring your Tachyon.
Follow the instructions here →
Quick Notes
- You don’t need any other accessories (like display, mouse, or keyboard) for the initial setup
- USB-C is preferred for power and data — avoid low-quality or charge-only cables
- If something doesn’t light up or connect, double-check your battery orientation and cable quality
Need help? Reach out on the forum and we’ll help you get sorted.
Desktop Setup
For desktop operation (well, specifically, to "use the desktop") you need more cables attached. Actually the desktop build runs just fine as the headless configuration as the USB-C is reversible, but we've included this diagram fully here.
Complete Desktop Setup
Here is a complete desktop setup where we are using an USB-C hub to connect an HDMI display, keyboard, mouse, and bring in power.
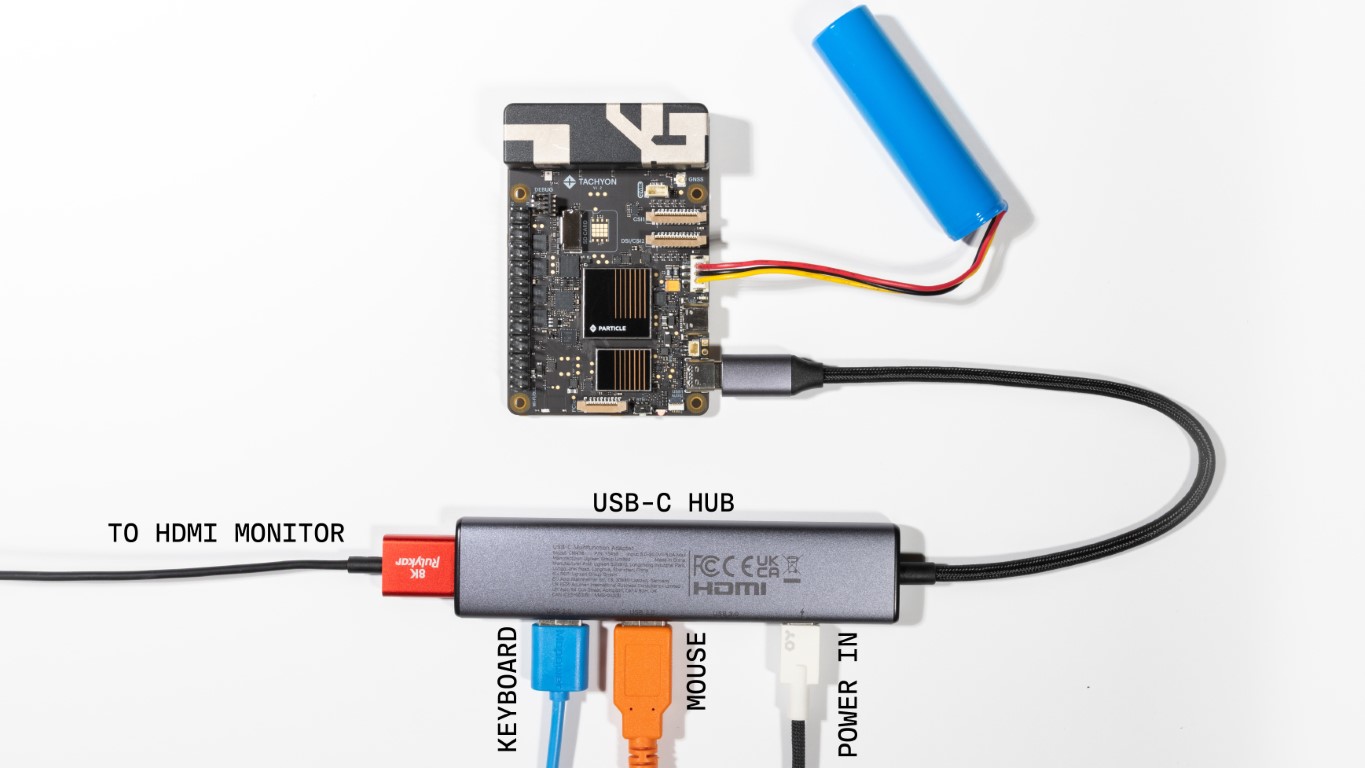
We are using the UGREEN Revodok 105 USB C Hub 5 in 1 Multiport Adapter in this example.
Notes:
- We currently have an issue hot plugging the reversible USB-C cable. As such, if you don't boot it with the USB-C hub attached, it struggled to role switch into using the USB-C hub.
- You need to provide power to the USB-C hub for the hub to work. You can use USB-C display mode without external power, but you need to select a USB-C hub that supports this (or direct connect to a display that supports this, OR use just a single USB-C to HDMI adapter that is self powered)
- Keyboard and mouse are used to control the desktop!