First Boot: What to Expect
Once flashing is complete, your Tachyon will go through its initial boot process.
This stage sets up the OS, system services, and connectivity. The exact behavior depends on whether you flashed the Headless or Desktop image:
- Headless: Boots automatically and begins configuration.
- Desktop: Requires a power cycle and USB-C hub setup before launching the desktop environment.
The sections below outline what happens during first boot, how connectivity is established, and what to expect from the desktop experience.
By default, the display is disabled when Tachyon is set up in headless mode. However, you can manually start a basic Weston display session if needed.
To enable the display for the current session, run:
systemctl start init_display
To automatically start the display on boot, run:
systemctl enable init_display
Note: In desktop mode, Tachyon boots directly into the GNOME GUI.
Boot Process Overview
Upon first boot, the Primary LED will transition from flashing yellow to flashing green.
Refer to the LED page for a full breakdown of LED behaviors.
Booting Tachyon for the first time typically takes 20-30 seconds, during which:
- The bootloader starts.
- The UEFI bootloader initializes and loads the Linux kernel.
- The Linux kernel starts, loads the system disk, and mounts the user-space OS.
- The user-space OS starts, launching system services.
- Particle-specific services (prefixed with
particle-) start running.particle-ril.service→ Manages the 5G radio.- Other services configure Wi-Fi, device connectivity, and platform integration.
Once these steps complete, the device finalizes its networking setup.
Wi-Fi & Cellular Connectivity
- If you configured Wi-Fi during setup, the system will attempt to connect to it on first boot.
- Once online, the built-in 5G modem will automatically download eSIM profiles in the background (this can take ~60 seconds).
- The first cellular connection may take 2–5 minutes as the device registers on the network.
- Future boots will be faster as saved network profiles are reused.
Once the device is online (via Wi-Fi, Cellular, or Ethernet):
- It will appear in the Particle Console.
- You can access it remotely via SSH, ADB, or the web console.
If your status LED is stuck blinking yellow, blinking green, or glowing green—and the device doesn’t connect to Wi-Fi or Cellular—try power cycling the device.
Still stuck? Feel free to reach out on the community forums—we're here to help!
Running the Desktop Build (Optional)
If using a desktop build:
- Connect a USB-C hub before powering on. (we recommend UGREEN Revodok 105 USB C Hub)
- Attach an HDMI monitor, keyboard, and mouse.
- Connect a USB-C PD Power Supply (most modern >30W USB-C PD capable power supplies are supported)
- Attach the 3-pin Li-Ion battery
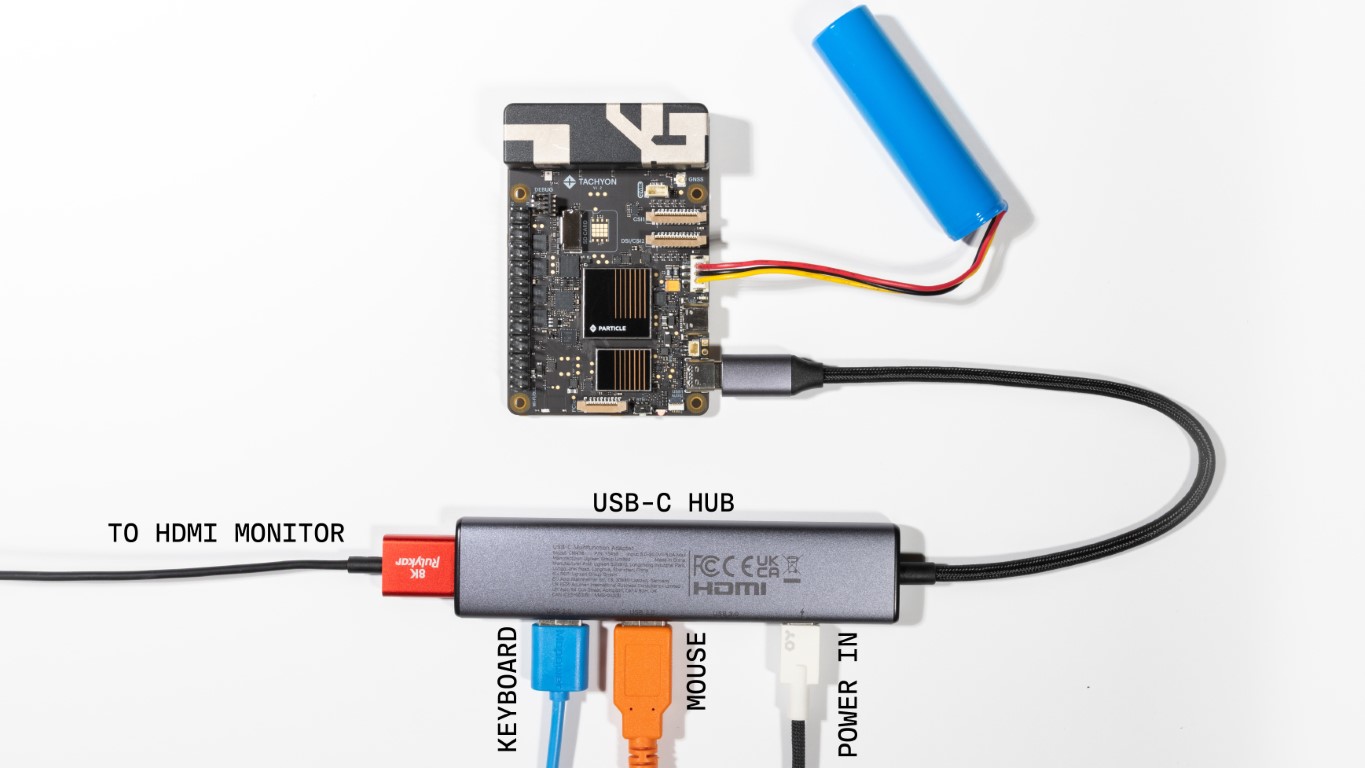
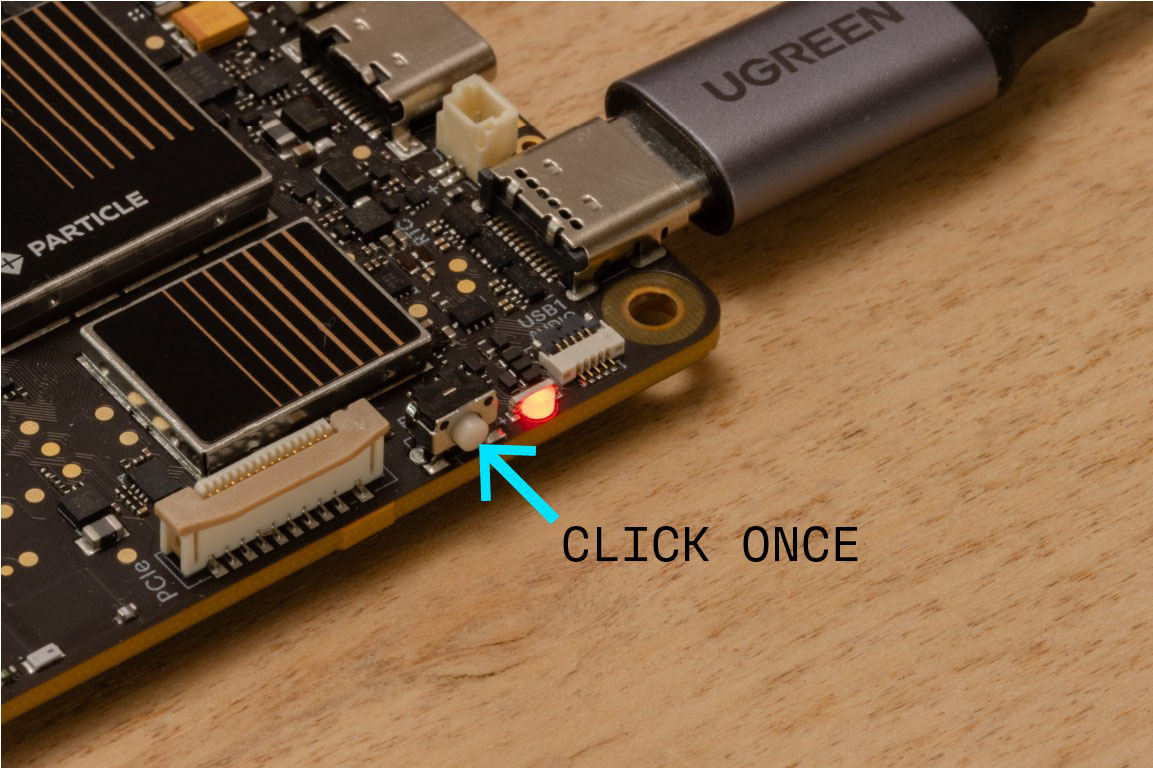
- Press the button once
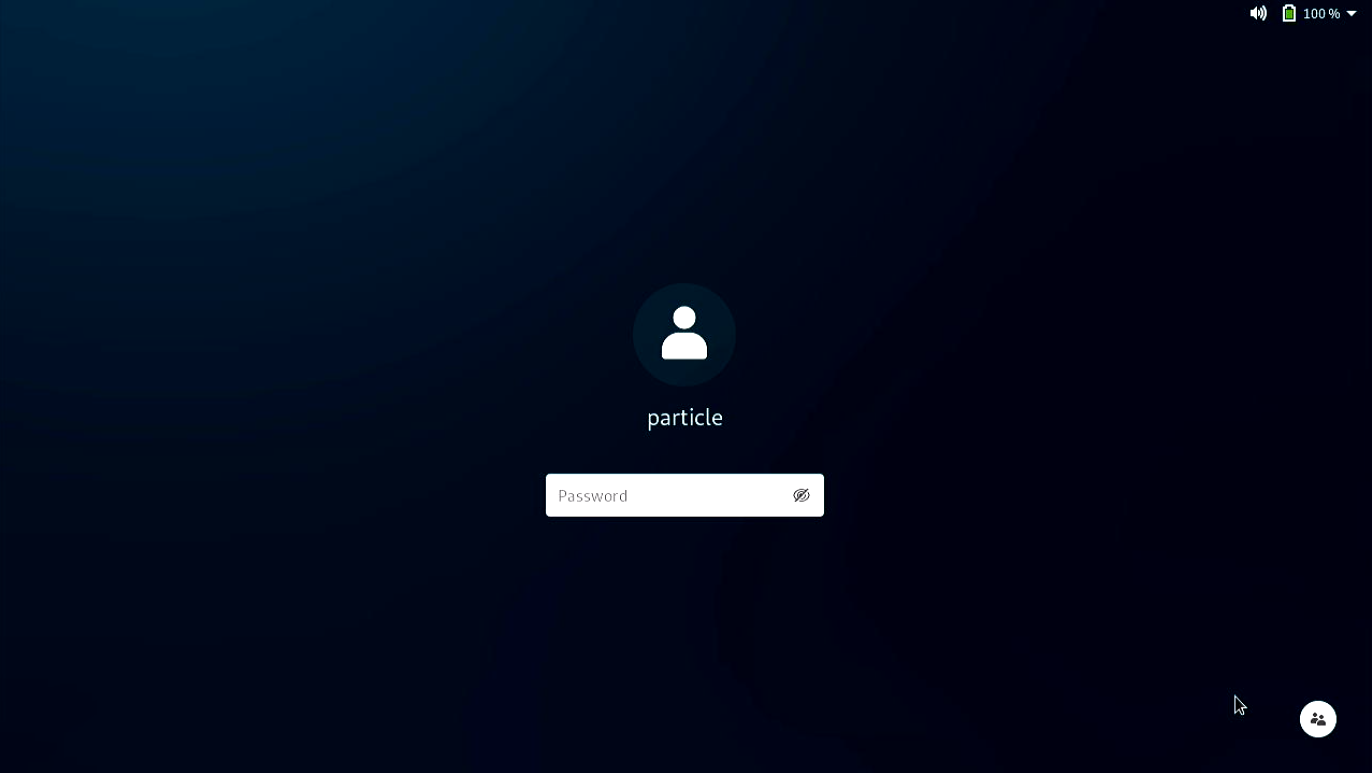
- The desktop environment will load automatically. You need to login to the desktop to get to the user interface. Only the Particle user can login here as root is forbidden - the password is the same as the you specified during setup.
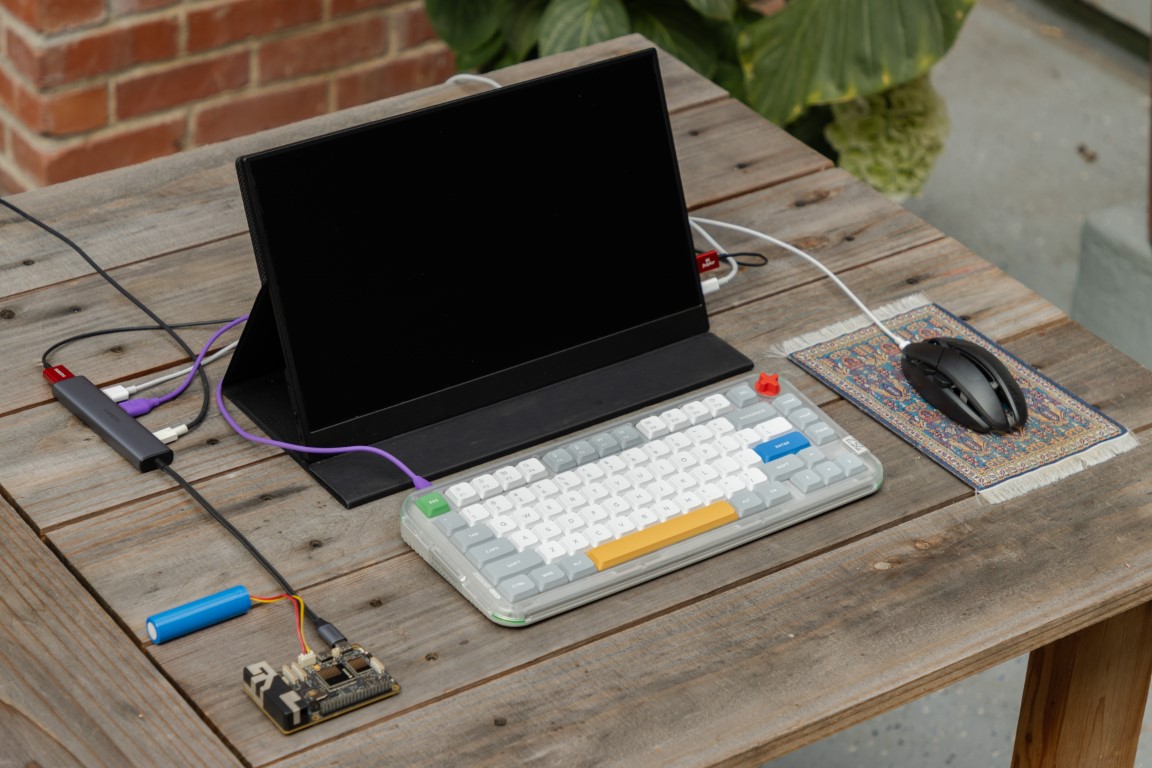
Here is an example of a complete desktop setup with a portable HDMI monitor, keyboard, and mouse.
Next Steps: Programming Your Device
After boot-up, the next step isn’t just to deploy an application—it’s to program your device.
Particle provides a powerful framework called Particle Applications, which lets you build, deploy, and manage software for your device. Learn more about Particle Applications here.
Particle Applications allow you to run containerized workloads on your device. These can be developed on your desktop using Visual Studio Code, or even directly on the device itself if you're using a Desktop build.
You can get started quickly using one of the available blueprints, which provide reference implementations and templates for common use cases.
Here are a few key facts about Particle Applications:
- Applications are containerized, making them easy to build, deploy, and manage consistently across devices.
- Applications are automatically downloaded and run on your device after setup.
- They support custom configurations and dependencies, which are pulled in as part of the deployment process.
- Applications start automatically after installation.
- You can update and manage them over-the-air using the Particle Cloud.
Security Considerations for Development vs. Production
- Current builds are development builds with:
- Root access enabled for convenience.
- Pre-installed Particle services running with low-privilege users.
- Production builds will be locked down:
- No root access.
- Only required services will be active.
🔹 For development, you have full access. For production, security is a priority.
Tips & Best Practices
✔ Don't forget your root password!
- During setup, you were prompted to set a root password.
- Root access is only available in development mode.
- In production, root login will be disabled.
- This password is also applied to the 'particle' user which is the default user on the board. This is needed as the desktop build does not support root login (good!) and so we've created this automatically.
Note that user setup and configuration will come soon to the Particle Console
✔ Services differ between development and production
- Some services auto-start in development but will not in production.
- These services include debugging tools, remote access utilities, and certain system logs.
✔ Accessing the Console
- See the Linux Console Access Guide for SSH, ADB, and serial options.
Next Step → Access the Console